Distribution Profiles
Where to find it
Sidebar > Distribution > [Entity] > Create Profile
Distribution Profiles
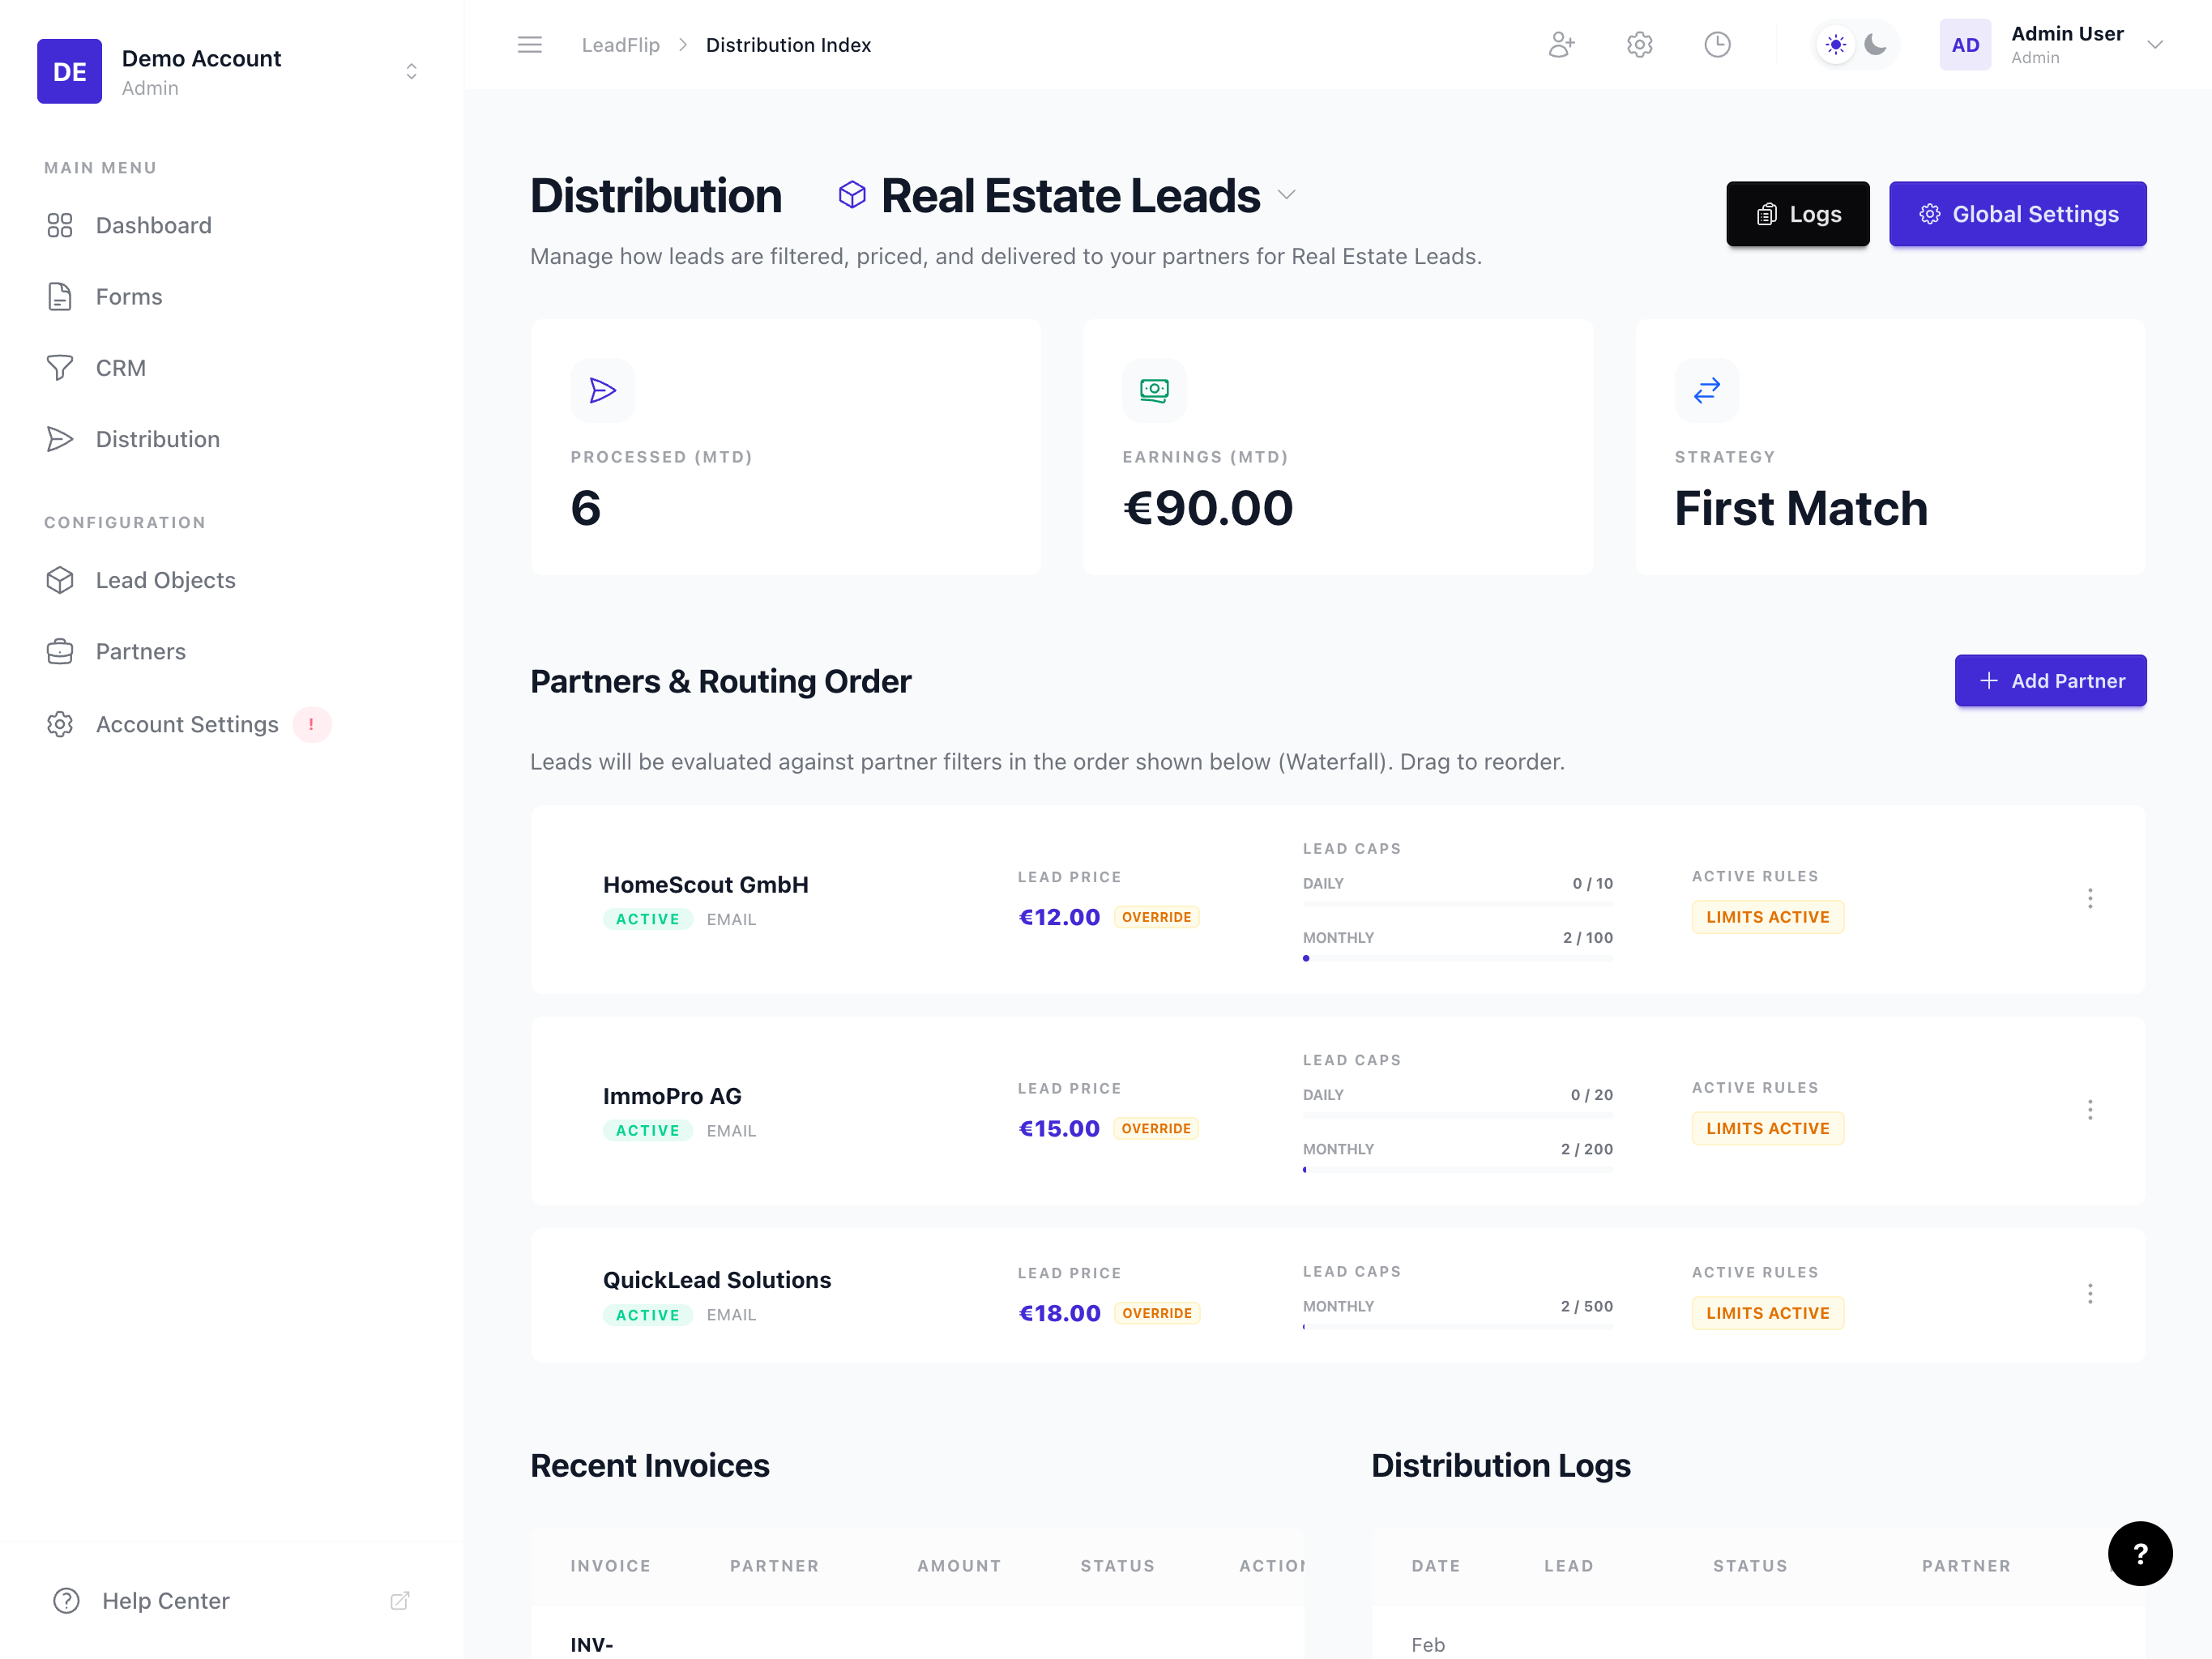
A Distribution Profile defines how leads for a given Entity are routed to partners. Each profile has rules, a list of partners, delivery settings, and caps. You can have multiple profiles per Entity (e.g., one for residential, one for commercial).
Creating a Distribution Profile
- Go to Distribution in the sidebar.
- Select your Entity.
- Click Create Profile or New Profile.
- Enter a name (e.g., "Residential Leads - East") and optional description.
- Save. The profile is created and ready for configuration.
Adding Partners to a Profile
- Open the profile.
- Go to the Partners section (or Add Partners).
- Select existing partners from your account or create new ones.
- For each partner, configure:
- Priority – How this partner ranks when multiple partners match (higher = preferred).
- Caps – Max leads per day, per month, or per period.
- Delivery channel – Email or webhook settings for this partner.

Setting Rules
Rules determine which leads are eligible for a profile and which partners receive them.
- Rule types – Field equals, contains, starts with; range (e.g., number between); status in list; custom conditions.
- Profile-level rules – Apply to all leads before they're considered for any partner. Example: "Only leads with status = New".
- Partner-level rules – Further filter which leads each partner receives. Example: "Only leads where ZIP starts with 90" for Partner A.
Routing by address sub-fields
When your Entity has an Address field (see Address Fields), each sub-field shows up as its own filter target in the rule dropdown, so you can route by postcode, city, state, country, or coordinates without inventing extra columns.
Typical examples:
Wohnadresse / LandequalsDeutschland: only German leads to this partner.Wohnadresse / Postleitzahlis one of10115, 10117, 10119: postcode list for a city-cluster partner.Wohnadresse / BundeslandequalsBayern: federal-state routing.
If a sub-field is empty on a given lead (e.g. only postcode was
captured), the rule simply treats it as empty, which works as
expected with is empty / is not empty operators.
For postcode-only funnels, enable Auto-enrich postcode on the Address field. Leadflip then expands the PLZ to city / state / country on save, so routing rules on those sub-fields work even though the user only typed a postcode.
Encrypted fields: Encrypted fields cannot be used in distribution rules. Use non-encrypted fields only. This applies to encrypted Address fields too; sub-fields of an encrypted Address are not available as routing targets.
Enabling and Disabling Profiles
- Enabled – The profile runs when new leads arrive. Matching leads are routed to partners.
- Disabled – The profile is skipped. No leads are distributed through it.
Toggle the profile's status from the profile list or settings.
Best Practices
- Name clearly – Use descriptive names (e.g., "Commercial - West Coast") so you can quickly identify profiles.
- Test with a small cap – Use low caps when first enabling a profile to ensure routing works as expected.
- Document rules – Add a description or internal notes to explain complex rule logic.