Automations Overview
Where to find it
Sidebar > CRM > [Entity] > [Status Group] > ⋮ Menu on stage column > Stage Automation
Automations Overview
Prerequisite: Automation actions that send emails (like "Send Email") require a configured SMTP server. Without it, email actions will fail. Go to Account Settings > Email Settings to set up your outbound mail server. See Email Setup (SMTP & IMAP).
Automations in Leadflip let you automate lead processing by running a sequence of actions whenever a lead event occurs. Instead of manually sending emails, updating fields, or assigning leads, you define an automation once and let Leadflip execute it automatically for every matching lead.
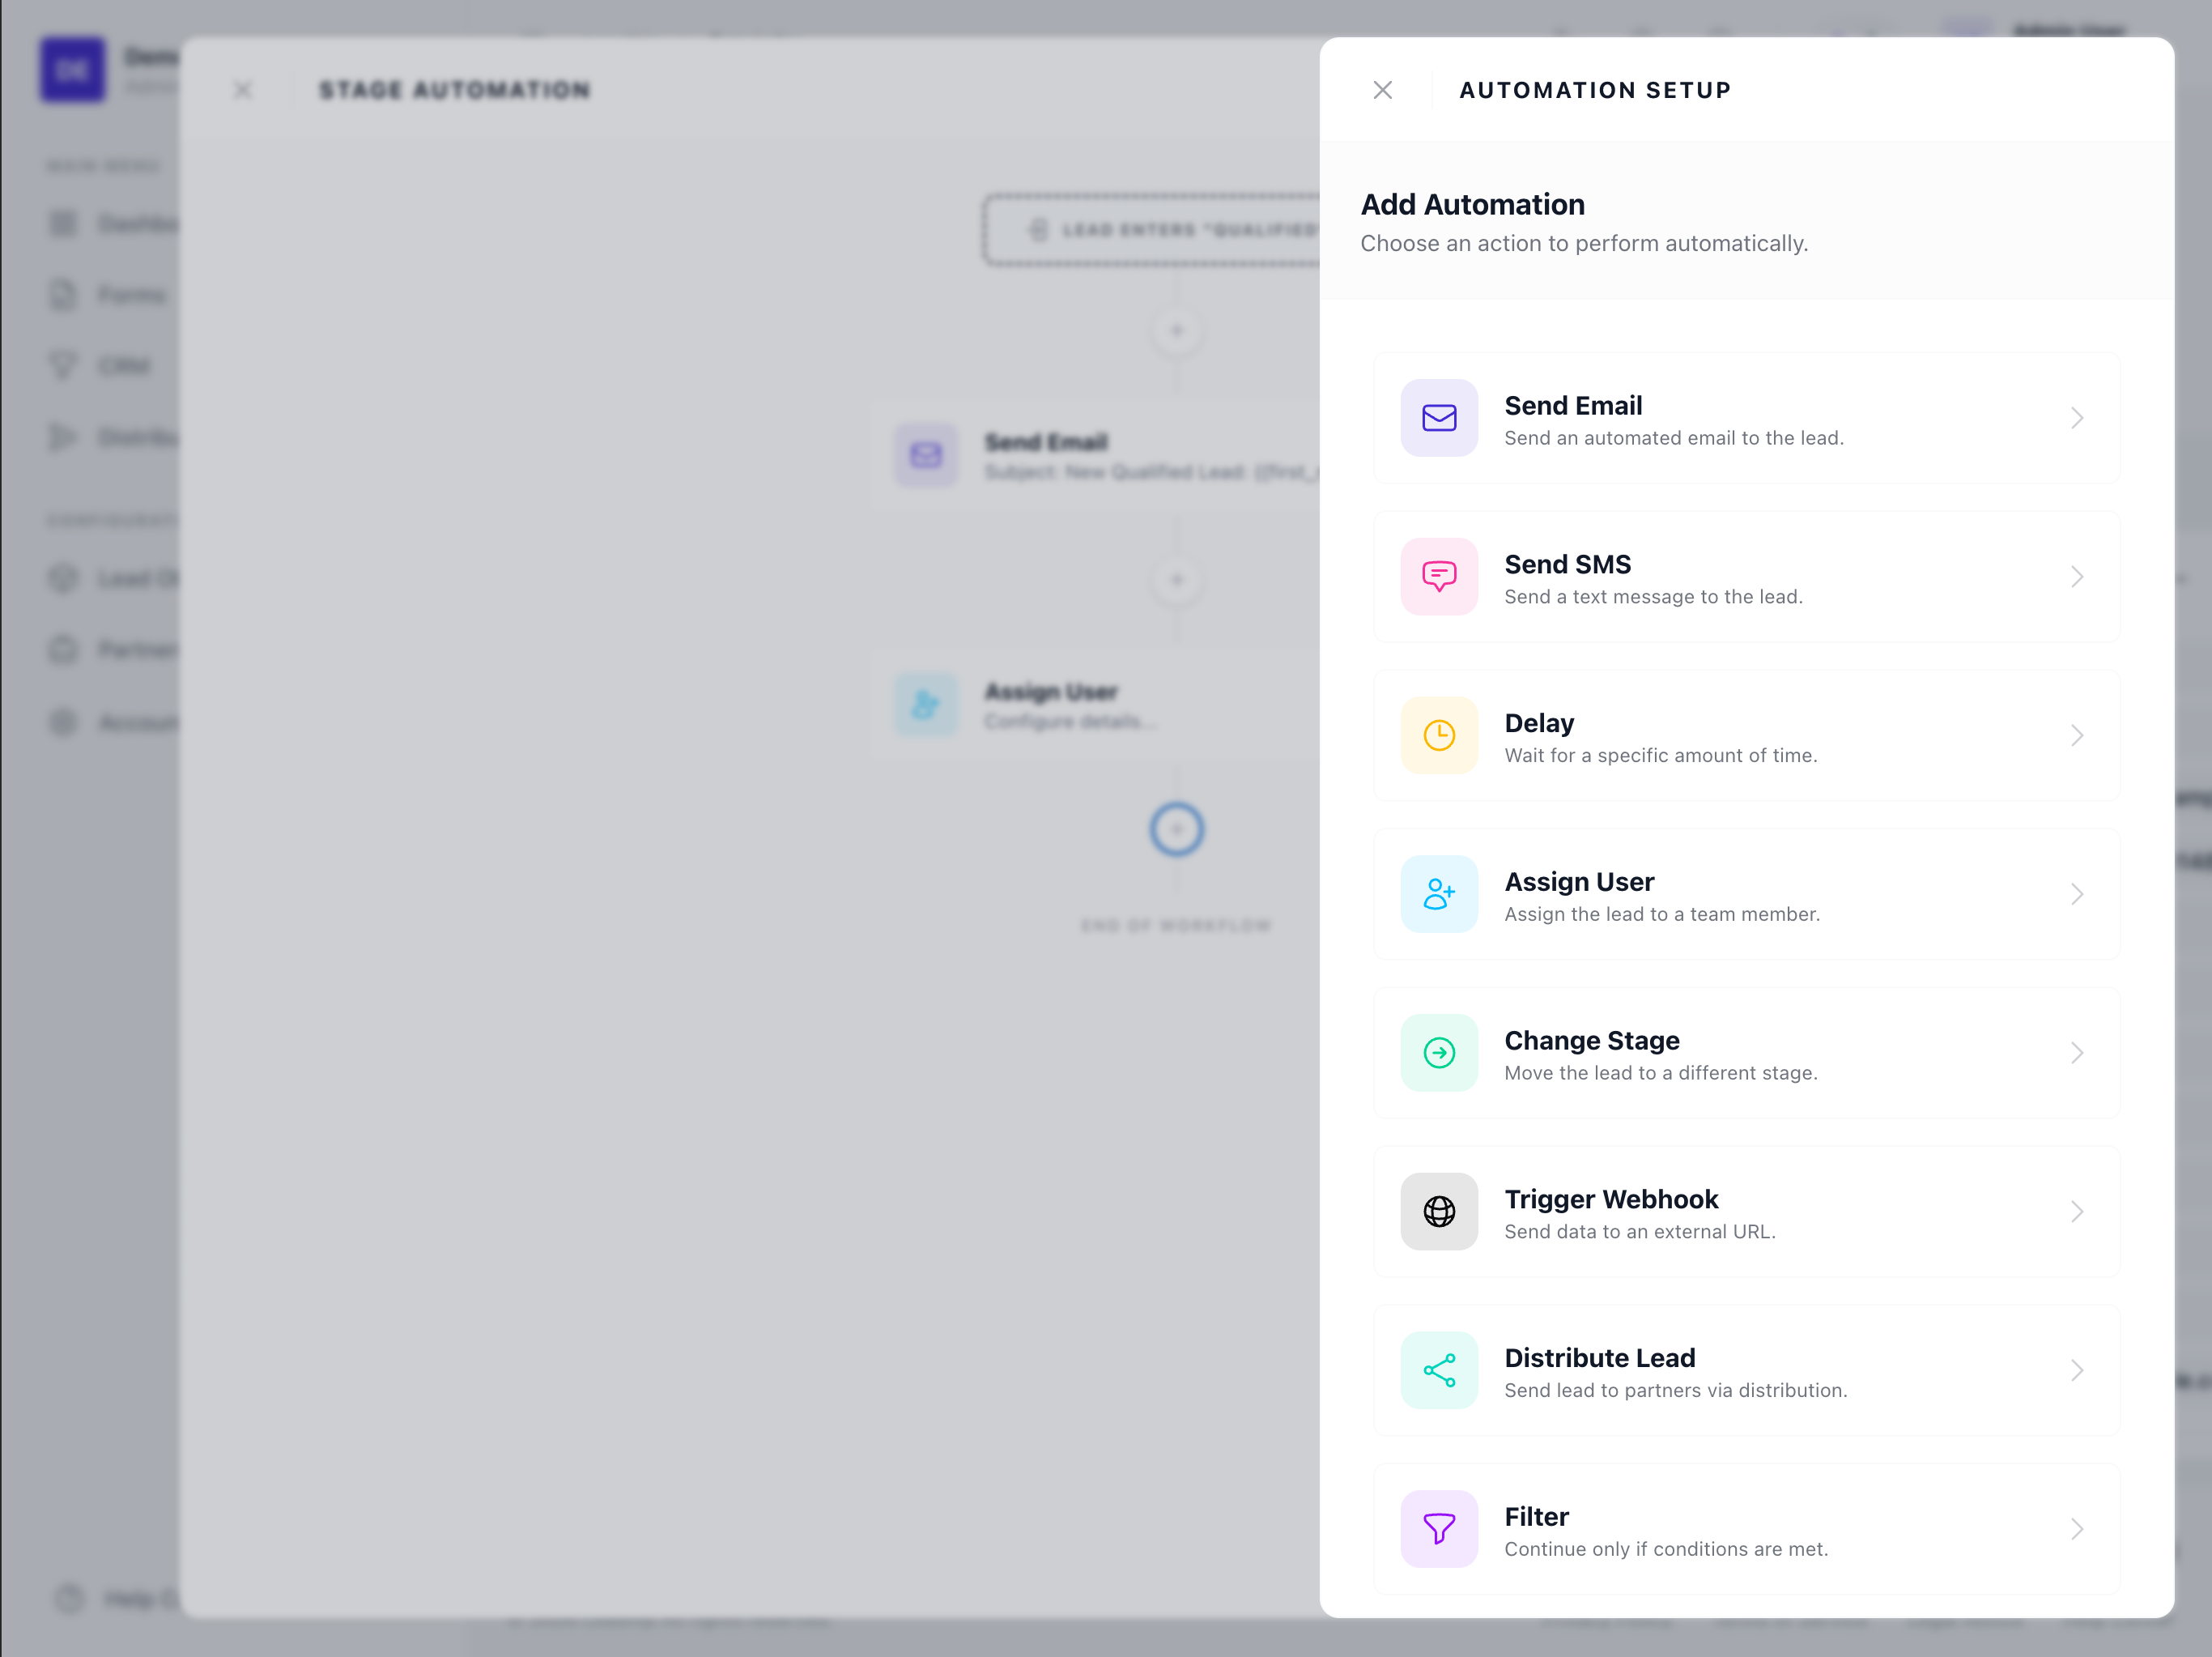
What Are Automations?
An automation is a chain of steps (actions) that run in order. Each step can:
- Send an email or SMS
- Call a webhook
- Update lead fields or change stage
- Assign the lead to a user
- Add delays, branch with filters, or perform other actions
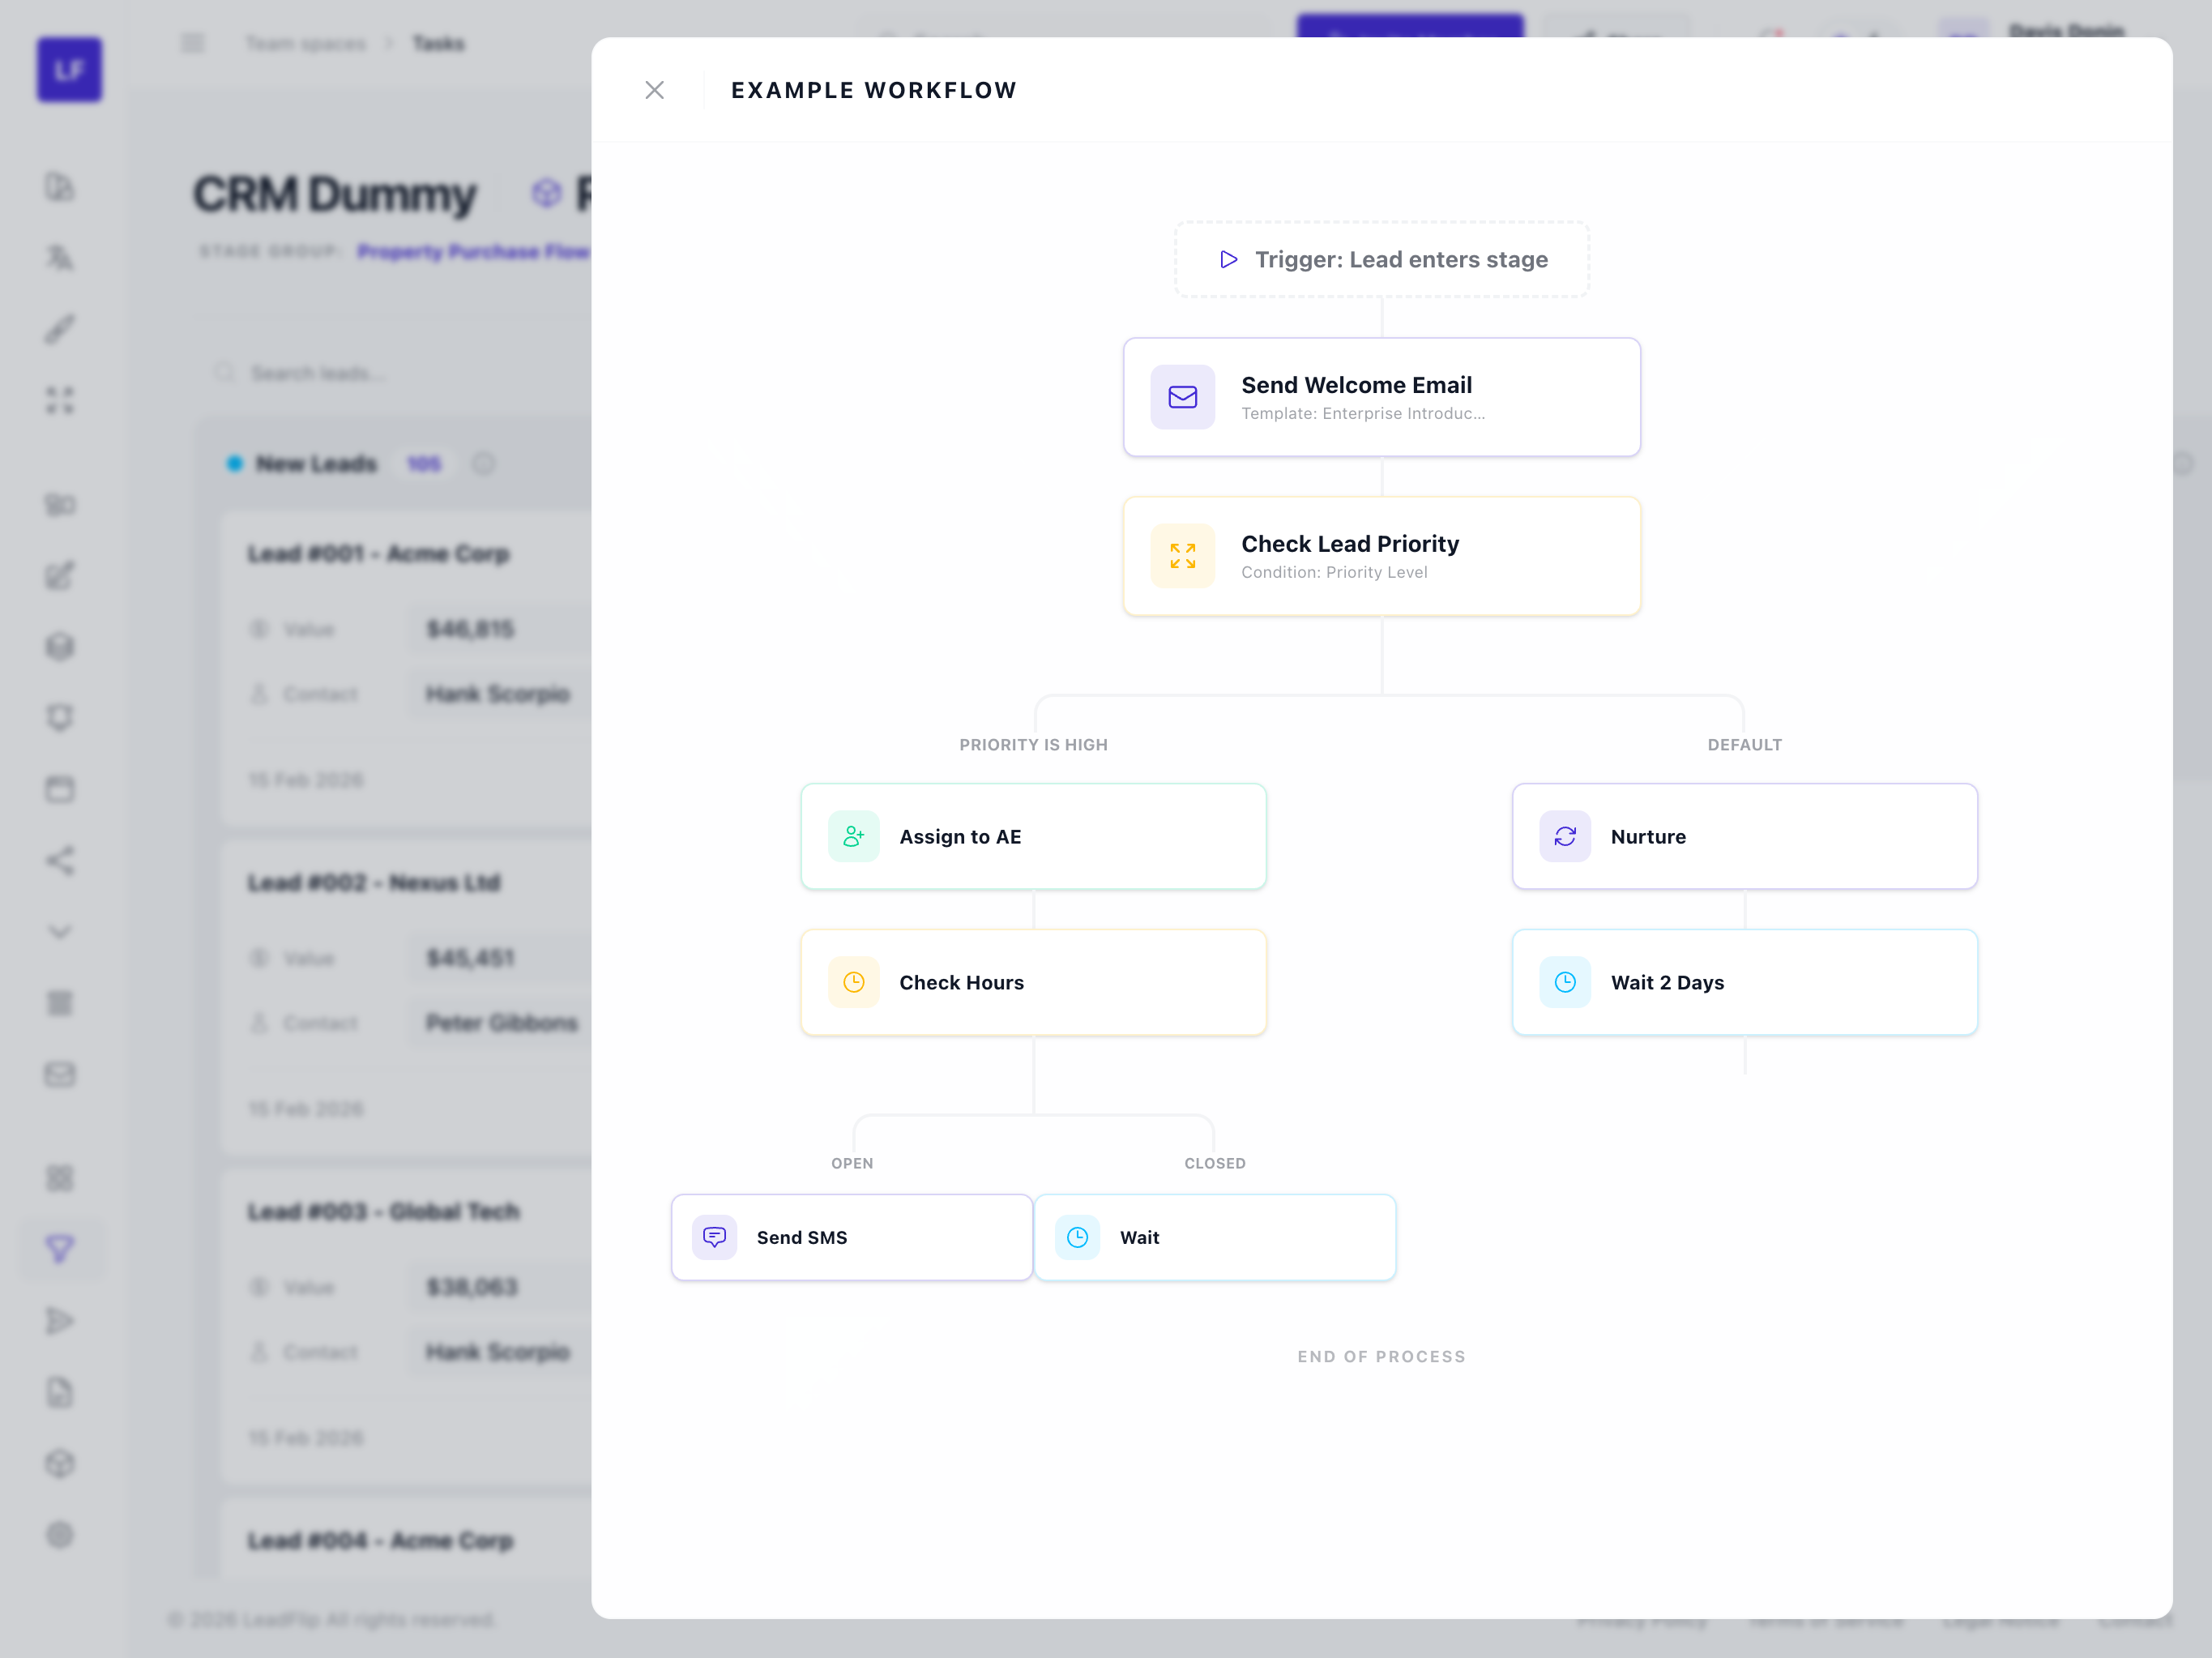
Automations are event-driven: they start when a trigger condition is met, such as a new lead being created or a lead's status changing.
How Automations Are Triggered
Automations trigger on lead events:
| Trigger | When It Fires |
|---|---|
| On lead creation | A new lead is created (e.g., from a form submission, API, or import) |
| On status change | A lead's status changes to a specific value (e.g., "New" → "Contacted") |
You can configure one or more triggers per automation. For example, an automation might run only when a lead is created and has a certain field value, or when a lead moves into a specific pipeline stage.
The Visual Builder
The Automation Builder is a visual, drag-and-drop interface:
- Canvas – Add actions by clicking Add Action and choosing from the action library.
- Sequential flow – Steps run top to bottom. Connect steps to define the order.
- Branching – Use Filter and Path actions to create conditional branches (e.g., send different emails based on lead source).
- Live preview – See the flow structure as you build it.
Where to Find Automations
- Go to CRM in the sidebar.
- Select your Entity and then the Status Group (pipeline).
- On the Kanban board, find the pipeline stage column you want to automate.
- Click the ⋮ (three-dots menu) in the column header.
- Select Stage Automation.
This opens the automation visualizer for that stage, where you can create new automations, edit existing ones, and access Automation Logs to debug executions. If a stage already has an active automation, you'll see a small ⚡ bolt icon next to the column header.
Best Practices
- Start simple – Begin with a single action (e.g., send a welcome email) and add complexity over time.
- Use filters – Avoid running unnecessary actions by filtering leads with conditions.
- Check logs – Use automation logs to verify steps run as expected and troubleshoot failures.