Adding Fields to Your Form
Where to find it
Sidebar > Forms > [Form] > Edit > Field Panel
Adding Fields to Your Form
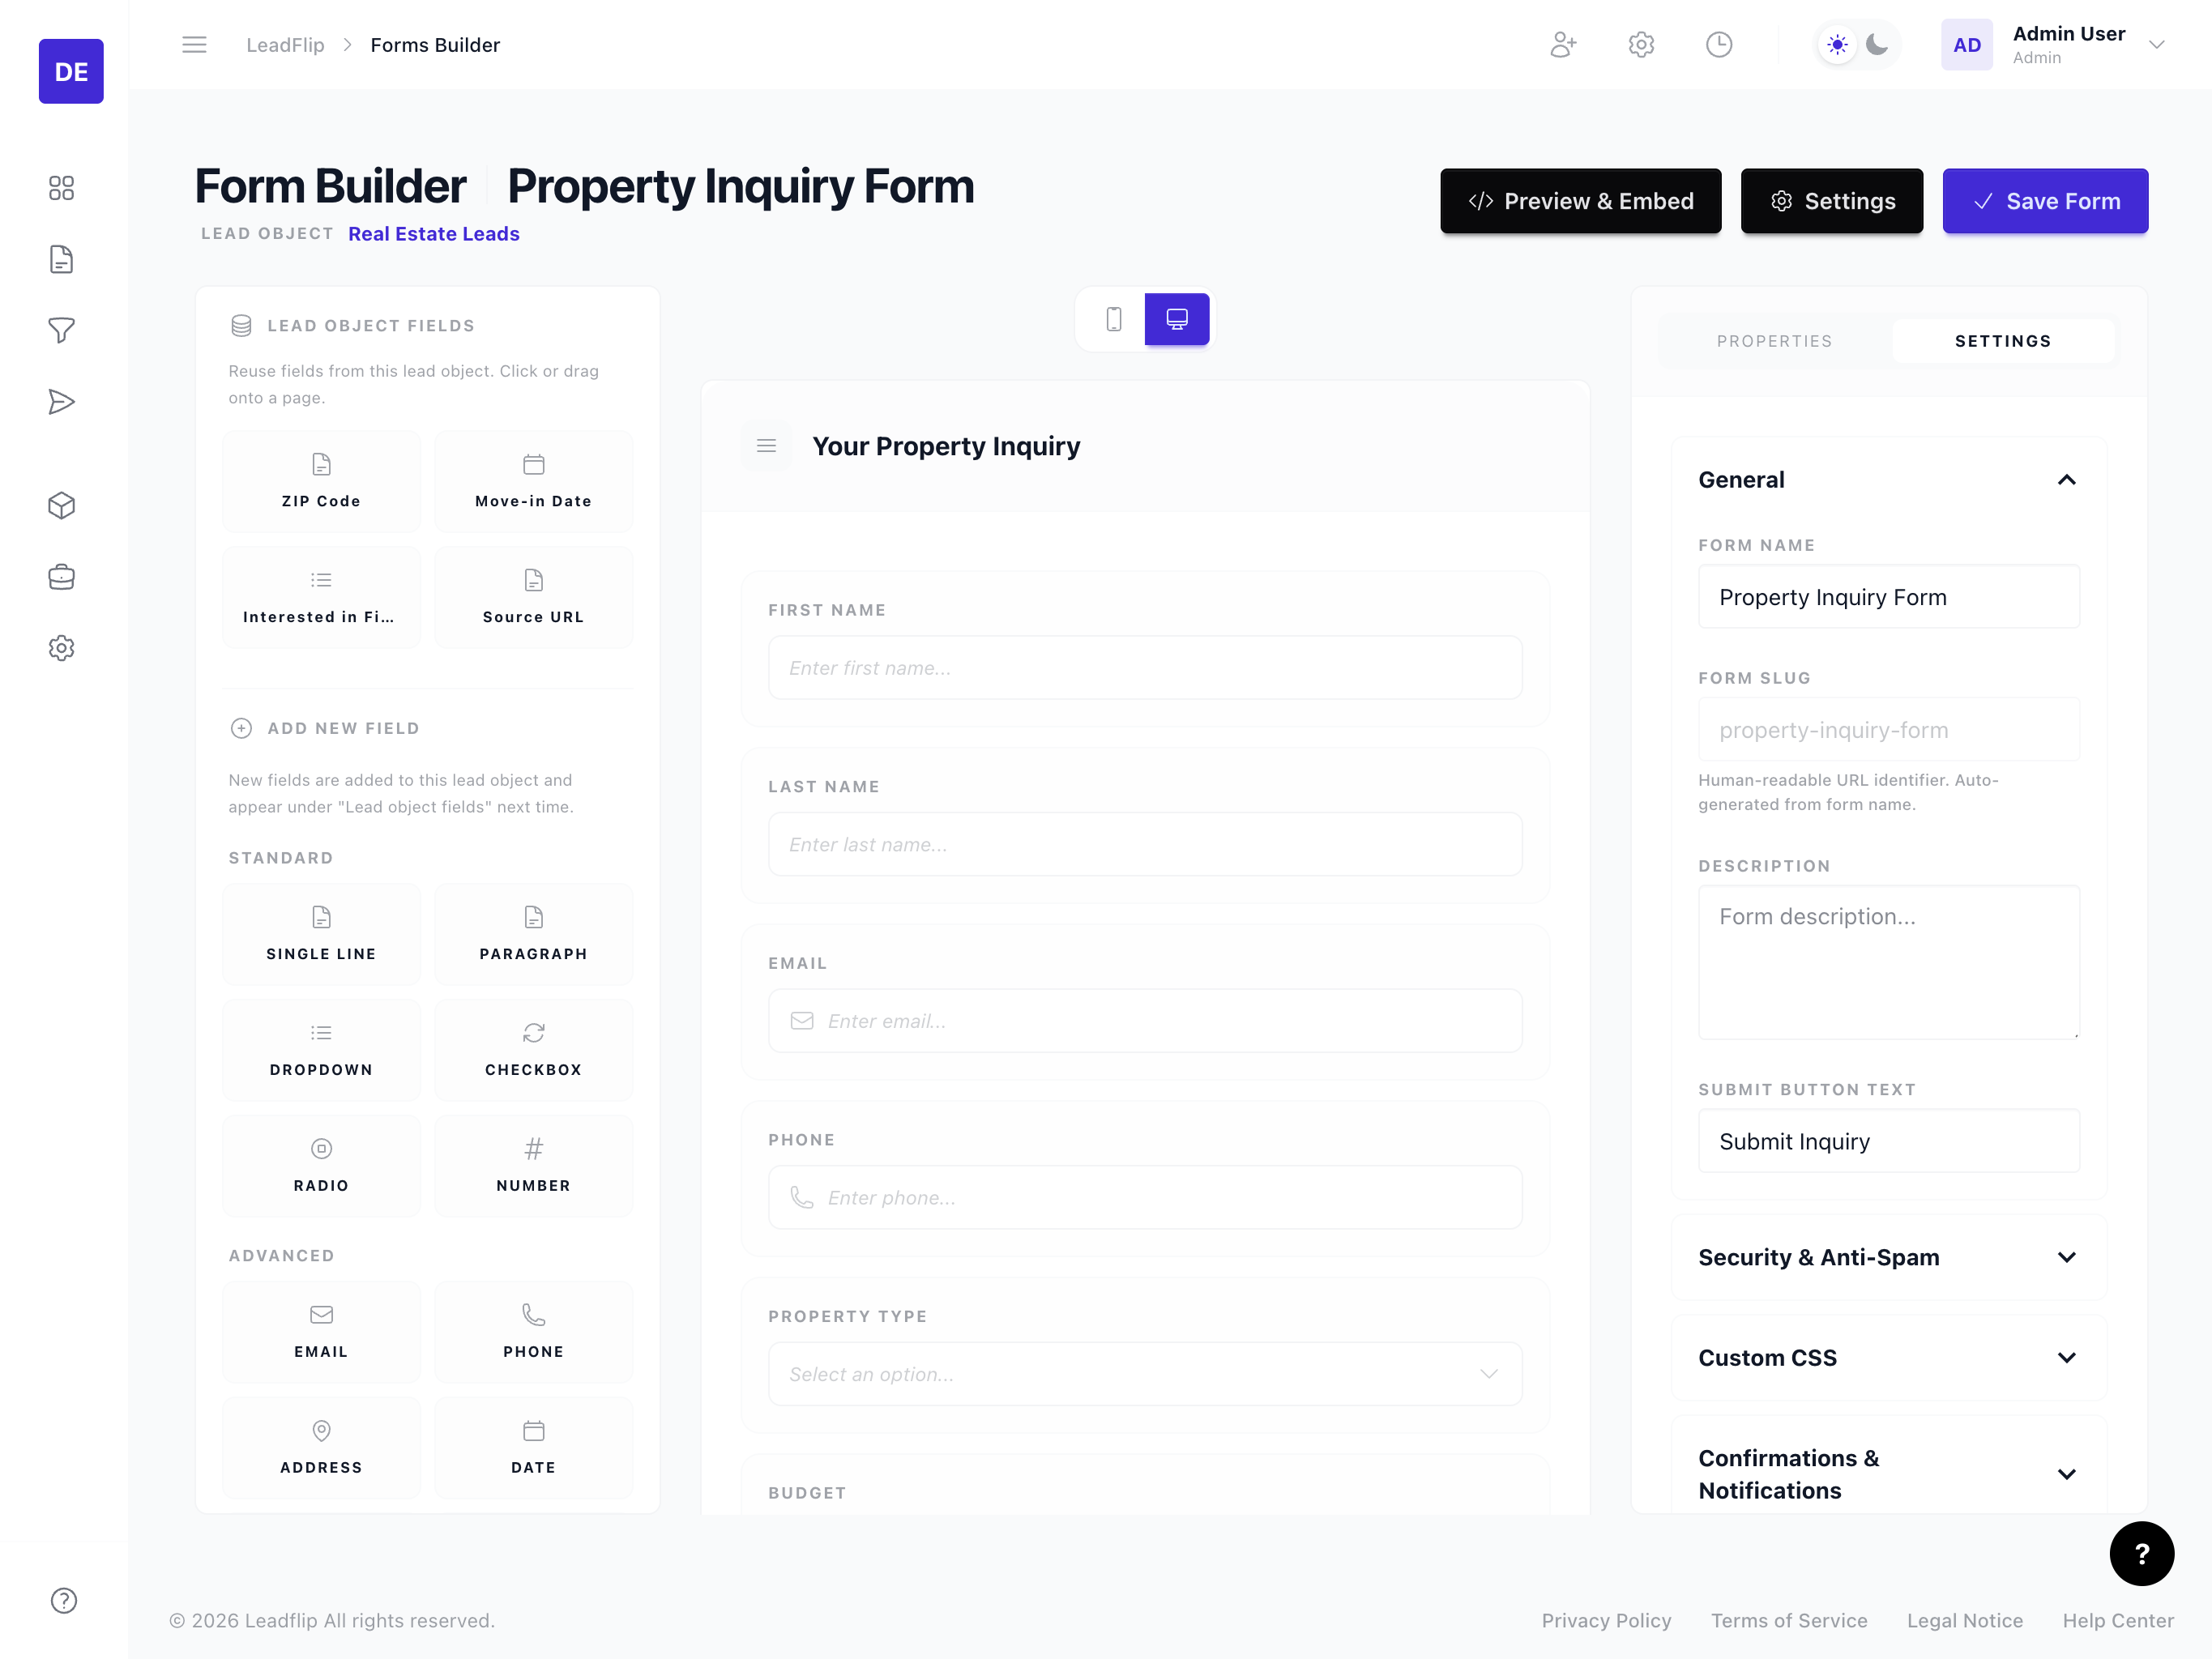
The Form Builder's field panel shows all fields from your Entity. Adding fields to your form is as simple as dragging them onto the canvas. This guide covers adding, arranging, reordering, and deleting fields.
The Field Panel
When you open the Form Builder, the field panel appears on the left (or in a collapsible drawer on smaller screens). It lists every field defined on your form's Entity, including:
- Text fields. Single-line text, email, phone, number
- Select fields. Dropdown, radio/checkbox list, or image choice (display variants of the select type)
- Date and time. Date picker, datetime
- Long text. Textarea for longer responses
- Address. Structured postal-address field with search autocomplete, sub-field visibility, and optional Lot Marker map linking. See Address Fields.
- Lot Marker. Interactive map for drawing a property boundary. Can be linked to an Address field for two-way auto-fill.
- Special fields. Checkbox, file upload, formula (calculation)
- Page break. Splits the form into multiple pages
Adding a Field
Method 1: Drag and Drop
- Locate the field in the field panel.
- Click and hold the field.
- Drag it onto the form canvas where you want it.
- Release to drop. The field appears in place.
Method 2: Click to Add
- Click a field in the field panel.
- The field is added to the bottom of the form (or the end of the current page if you have page breaks).
- Use drag-and-drop to move it to the desired position.
Reordering Fields
To change the order of fields:
- Click and hold the drag handle (grip icon) on the left of a field row.
- Drag the field up or down.
- Release to drop. The form updates immediately.
Reordering affects the tab order and visual flow of the form. Put the most important or commonly used fields near the top.
Removing a Field from the Form
To remove a field from the form (without deleting it from the Entity):
- Click the field to select it.
- Click the Remove or trash icon in the field toolbar.
- The field is removed from the form but remains in the Entity and can be re-added anytime.
Deleting an Entity Field
If you accidentally created an Entity field or no longer need it, you can delete it directly from the field panel:
- Hover over the field tile in the left sidebar.
- A trash icon appears on the tile.
- Click the trash icon.
- A confirmation modal appears, warning that this action is permanent.
- Confirm to delete.
Deleting an Entity field permanently removes the field definition and all associated data: any form fields referencing it and all lead values stored for that field. This affects every form that uses this Entity field. Use this with caution.
Field Types and Behavior
- Required fields. If a field is marked required in the Entity, it will be required in the form by default. You can override this in field properties.
- Read-only fields. Formula fields and some system fields are read-only; users cannot edit them.
- Hidden fields. You can add hidden fields to pass values (e.g., UTM parameters) without showing them to the user.
Best Practices
- Logical grouping. Group related fields (e.g., contact info, property details) and use page breaks for long forms.
- Progressive disclosure. Use conditional logic to show fields only when relevant.
- Mobile-first. Place critical fields early; users on mobile may abandon long forms.